Showing posts with label Sides. Show all posts

Friday, March 8, 2013

Fennel, Apple & Celery Root Slaw


Cabbage slaws are great... but after having them every weekend during summer barbecues, it was time for something new.  This three ingredient slaw has sturdy texture that holds up to a creamy dressing! The fennel's licorice flavor is nicely balanced by the granny smith apple as well as the honey in the dressing. Fantastic flavor combination!


You can make the entire slaw a day ahead of when you plan to eat it, but make sure to dress it shortly after you cut the ingredients, otherwise, without the acid, they start to brown very quickly.

Fennel, Apple & Celery Root Slaw


Ready, Prep, Go!


Julienne the fennel, celery root and granny smith apples


Dressed with Greek Yogurt, this is a refreshing slaw that is delicious all year-round!


Fennel, Apple & Celery Root Slaw


Fennel, Apple & Celery Root Slaw


Serves 10 as a side

Ingredients

2 fennel bulbs, medium size
2 granny smith apples
1 large celery root, peeled
3 Tablespoons olive oil
3 Tablespoons white balsamic vinegar
3 Tablespoons greek yogurt (Fage 0)
2 teaspoons mayonnaise
1 Tablespoon honey
kosher salt
freshly ground pepper
2 teaspoons chopped fresh parsley


Directions

1. Using a mandolin, shave the fennel.
2. Using a mandolin, julienne the apples and celery root. Toss with the fennel in a large bowl.
3. In a small bowl combine the olive oil, white balsamic vinegar, greek yogurt, mayonnaise and honey. Whisk together and taste.  Add kosher salt and pepper to taste
4. Toss the dressing with the fennel, apples and celery root.  
5. Eat immediately, or chill for up to two days. (It tastes best after being dressed for about 1 day)
6. Add the parsley before serving.

Eat, Drink & Be Yummy!

Wednesday, March 6, 2013

Carrot Croquettes with Yogurt Dipping Sauce


Keeping things interesting is always a challenge. It's so easy to fall into a food routine. I often make zucchini pancakes because they're easy and I somehow always have zucchini or summer squash on hand. But why not make something similar with carrots?!

Carrot Croquette with Yogurt Dipping Sauce

This dish has as much flexibility as I love with most of my go-to recipes. Add whatever herbs and seasonings you like. Don't want to fry them on a skillet? Bake them at 400 degrees for 20 minutes. No panko? Breadcrumbs will work just as well.

These were a big hit with the kids, as well as a small dinner party that I hosted. All of the other appetizers were cold, so I was able to make these and serve them immediately. These carrot croquettes are yummiest when they're immediately made, but you can make a batch big enough to refrigerate and then reheat.

Enjoy!

Inside shot of the Carrot Croquette

Carrot Croquettes with Yogurt Dipping Sauce

Makes approximately 25 croquettes

Ingredients

For the Carrot Croquettes:
1 pound carrots, thinly shredded

3 cloves garlic, finely minced/grated
1/2 cup Panko bread crumbs, plus more for coating

2 large eggs
1 teaspoon salt
1/2 teaspoon freshly ground black pepper
For the Yogurt Dipping Sauce:
1/3 cup Fage 0 (or any other kind of Greek style yogurt)
1 tablespoon freshly squeezed lemon juice
2 cloves garlic, grated
1 tablespoon parsley, finely chopped.

Vegetable oil for frying

Directions

Combine all ingredients for the Yogurt Dipping Sauce. The sauce can be made up to 1-2 days in advance.

1. Drain as much liquid as possible from the finely shredded carrots by putting them into a kitchen towel and squeezing out excess liquid.
2. In a large bowl, combine finely shredded carrots with garlic, panko, eggs, salt and pepper.
3. Using a 1.5 tablespoon ice cream scooper (I like uniform croquettes) or soup spoon, scoop out a spoonful of the carrots. Gently flatten and form into a 1 1/2 inch patty. 
4. Gently roll in reserved panko to coat. Place on a platter. Repeat with remaining carrots.
5. Heat skillet with a couple of tablespoons of vegetable oil over medium/high heat.
6. Working in batches (adding a couple of tablespoons of oil after each batch), fry croquettes until golden brown on each side (approximately 3 minutes per side). Transfer to a paper towel-lined plate to drain excess oil.
7. Serve & enjoy.

Eat, Drink & Be Yummy!

Wednesday, February 27, 2013

Roasted Carrots with Thyme


Roasted Carrots with Thyme


Carrots are usually the forgotten side dish. They're boiled into submission. They're taken for granted. They're neglected. Not these carrots! Hell no, they refuse to be ignored! These carrots are incredibly flavorful. They're tender and don't cross the line into mushy territory. And they're flexible. Almost any herb will compliment them: basil, parsley, dill and rosemary would stand in for thyme. Enjoy!


Cutting your carrots on a diagonal makes the look prettier.
Don't question this. It's true.


Carrots Pre-Bake


Carrots Post-Bake


Gently remove the thyme leaves from the sprigs. 
They will fall off quickly. Discard the sprigs and toss the 
thyme leaves with carrots to combine.


Roasted Carrots with Thyme


Roasted Carrots with Thyme

Adapted from Ina Garten

Ingredients

1 pound carrots
2 tablespoons olive oil
Sprinkle kosher salt
10 grinds black pepper

10-12 sprigs fresh thyme

Directions

Preheat the oven to 400 degrees F.
1. Slice carrots into 1 to 1 1/2 inch pieces (they'll shrink after they cook). If you cut them on the diagonal, they'll look fancy.
2. In a large bowl, toss carrots with olive oil, salt, pepper and thyme. 
3. Spread evenly on a baking sheet. Bake for 20 minutes, until browned and tender.
4. Remove thyme leaves from branches (they'll pretty much fall off as soon as you touch them).  
5. Toss and taste.  Adjust for salt and pepper.

Eat, Drink & Be Yummy!

Wednesday, February 13, 2013

Chickpea & Edamame Salad


I always knew that wine and cheese (and women!) get better with age. I'd like to officially propose the addition of this salad to the list. The first day you make it, it will be delicious. The day after, it will taste even better and by the third day you're going to wish that you didn't eat so much on day 1 & 2! This is a great salad to make at the beginning of the week and then enjoy throughout as a snack or as a meal.

Chickpea & Edamame Salad with Carrots, Red Peppers and Dried Cranberries

I set out to recreate Pret-A-Manger's Chickpea and Edamame Salad Pot and ended up with so much more! It has subtle textures: a little crunchy, soft and chewy. Fantastic flavor, hitting on sweet, sour and savory notes. This colorful and healthful salad is a huge hit with the kids, a great option for dinner parties and holds up really well for potlucks. 

Chickpeas, Carrots, Edamame & Cranberries


One red pepper, diced


All salad ingredients into one bowl.


Trying to get "the shot"


Chickpea & Edamame Salad


Chickpea and Edamame Salad


Adpated from Mother Thyme
Serves 10-12 as a side

Ingredients


Salad
3 15.5oz cans chickpeas (garbanzo beans) rinsed and drained
2 1/2 cups shelled edamame (soy beans)
1 red pepper, diced
3/4 cup carrots, diced
1/2 cup dried cranberries

Dressing
4 tablespoons canola oil
4 tablespoons olive oil
4 tablespoons white balsamic vinegar
1 tablespoon sugar
1/2 teaspoon dried oregano
1/2 teaspoon dried basil
Kosher Salt (about 1 1/2 teaspoons)
Freshly Ground Pepper (about 15 turns of the grinder)

Directions

1. In a large bowl combine chickpeas, edamame, red pepper, carrots and dried cranberries. Set aside.
2. In a small bowl combine dressing ingredients. Add kosher salt and pepper to taste (I've indicated what works well for us).
3. Add dressing to salad and toss to combine. Taste and adjust seasoning, if needed.
4. Serve at room temperature or chilled. 
5. Will keep in an air tight container in the refrigerator for up to 4 days.

Eat, Drink & Be Yummy!

Top Food Blogs-->

Monday, February 11, 2013

Lamb Plov (Uzbek Rice Pilaf)


Plov warms my soul. Not because of the temperature that it is served at, but because it reminds me of family. This is not a dish that I've ever made or consumed by myself. It's meant to be shared with a crowd. When someone makes it, the invitation goes out to everyone, "Come over, I'm making plov." You know it's going to be a great night!

While vodka and cornichons aren't required when eating plov, I highly recommend them!

As I prepare to write out this recipe, I'm bracing myself for the onslaught of "my grandma didn't make it that way" comments. I'm ready! As with most traditional recipes, every person/family/village will have their version. After a lifetime of eating delicious versions of plov, my cousins mother-in-law took the time to teach me. (Thank you D&K for letting me have access to L for an entire morning!!!!!!) No more "eyeballing" the ingredients, I finally had a definitive list of ingredients and technique. Definitely needed to have the technique.

This recipe also fits my criteria need and love of flexibility. Once you get the base recipe and technique down it's easily adjustable. If you love carrots, use more! Love garlic, add more! Not a fan of cumin? Leave it out. Make whatever adjustments you want, but make it. Make it and enjoy it with the people you love!

**Note about photos: Please follow the recipe, as I didn't photograph every step of the process.**

Lightly brown the onions in a bit of olive oil.
Don't worry about softening them, there's plenty of time for that.


Shredded carrots from Trader Joe's or 4 large carrots, shredded.
Cut them a bit so that they aren't too long and stringy.


Saute the carrots with the onions for a minute or two.


Cut the lamb off the bone into bite side pieces.


Brown the lamb with the onions and carrots.


When all of the meat has browned, add enough water to cover the lamb.
About 2-3 cups, depending on the size of your pot.
Stir occasionally while the lamb braises, about 1 hour.


Add water and spices to the lamb.
Taste. Adjust for seasoning and then add rice.


Stir rice to coat each grain and try to make a "mountain" in the middle of the pot. If it doesn't happen, don't worry.
Cover with a heavy lid, placing a paper towel or clean kitchen towel between lid and pot. 


Plov!


Lamb Plov

Serves 8-10 as an entree

Ingredients

2 tablespoons olive oil
2 large onions, diced
10oz carrots, shredded (1 bag from Trader Joe's) or 4 carrots coarsely grated
4 pounds of lamb shoulder, about 10 slices with bones, cut into bite size pieces
2-3 cups of water (approximately... read below)


4 ½ cups of HOT water (however many cups of rice you have plus ½ cup)
1 entire head of garlic (or 3 teaspoons crushed garlic)
2.5 tablespoons ground cumin
2 teaspoons ground corriander
3 tablespoons kosher salt
Freshly ground pepper

4 cups of jasmine
 (or other long grain) rice, rinsed and drained
2 thick paper towels or a clean kitchen towel


Directions

1. In a heavy bottomed cast iron pot, heat olive oil on High heat. Add onion, and saute until it starts to brown.
2. Add shredded carrots and saute until softened.
3. Add lamb and brown the meat.
4. Cover lamb with water (approximately 2-3 cups... depending on your pot size).
5. Let cook, uncovered, on Medium/High heat until majority of water has evaporated, stirring periodically. This takes almost an hour.
5a. If your lamb shoulder had bones in it... and IF you want to take the bones out, this would be a good time. Plenty of people cook plov WITH the bones, and that’s fine!! But I’d rather take the bones out now than have to think about it when I’m serving it to the kids.
6. Add 4 ½ cups of HOT water to the pot.
7. Add whole head of garlic and spices to the pot. Taste. It should be “stronger” than you think it should be, because once you add the rice, the flavor will dilute.
8. Add rice. Turn heat up to High.
9. Stir to get the rice kernels wet and try to make a “mountain” in the middle of the pot with the rice and meat. Sometimes it happens, sometimes it doesn't. Don’t stress.
10. Bring to a boil and turn heat to Low.
11. Cover with a heavy lid... with a paper towel or a kitchen towel under the lid. I don't know why this step is necessary, but it is. So don't mess with it, ok?
12. Set timer for 35 minutes... and walk away. NO peeking!
13. When the timer goes off, turn off the heat... remove lid and towel. Fluff and taste. 
14. Add additional seasoning (salt, pepper, corriander, cumin), if necessary.
15. Have some sliced cornichons on hand... and enjoy!

Eat, Drink & Be Yummy!

Friday, February 8, 2013

Tomato, Corn & Tarragon Salad


The first time I made this salad was with farm fresh corn and tomatoes from Connecticut farmers markets. Well, in truth, I made it when I was trying to use up leftover grilled corn from the previous nights barbecue. With beautiful grape tomatoes and a bit of tarragon, it was a refreshing, yet filling salad.


The salad also fulfills my need for flexibility. While I may give exact proportions for the salad, feel free to increase or decrease the ratio of corn to tomatoes. If you don't have fresh tarragon (or don't like tarragon), a great substitution would be fresh basil. 

In the winter months, I'm more than happy to recreate the salad using frozen corn. I love the mixture of Trader Joe's Fire Roasted Corn with their Cut White Corn. The charred, smokey flavor marries so well with the sweetness of the white corn. Enjoy the salad either at room temperature or slightly warm... either way, it's fantastic!


Finely dice two shallots (about 1/2 cup)


About 2 cups of frozen (or fresh!!) corn kernels.
OK, fine... 2 1/2 cups ;)


Shallots & frozen corn kernels ready for action!


Lightly saute shallots, until they just start to soften and brown


Add corn kernels and saute until just warmed through, about 2-3 minutes


Grape tomatoes. Halved.


Tarragon: whole leaves


Tarragon: finely chopped leaves


Tomato, Corn & Tarragon Salad


Tomato, Corn & Tarragon Salad

Serves 6-8 as a side

Ingredients

2 teaspoons canola oil
1 cup Trader Joe's Fire Roasted Frozen Corn

1 1/2 cups Trader Joe's Cut White Corn
1/2 cup diced shallots
1 1/2 pound grape tomatoes, halved
1 tablespoon chopped fresh tarragon, more to taste
Kosher salt
Freshly ground pepper

Directions

1. Heat oil in a skillet over medium heat. 
2. Add shallots and saute, until lightly browned, about 3-4 minutes.
3. Add corn and saute until warmed through, about 3-4 minutes.
4. Remove from heat and let cool for 5-10 minutes.
5. In a large bowl, combine corn and shallot mixture, tomatoes, and tarragon. Gently toss.
6. Season with kosher salt and freshly ground pepper to taste.

Eat, Drink & Be Yummy!

Thursday, February 7, 2013

Black Olive & Rosemary Bread


Baking used to intimidate me. I always felt that it was much more of an exact science than cooking. I saw cooking as an art form where I could add a pinch of this and a dash of that to create yumminess. Baking intimidated me because I thought that I couldn't be flexible and I didn't know how to make substitutions.... and then I learned how. 


Baking bread is a perfect example. I didn't have enough bread flour. I had 2 cups and the recipe calls for 3 cups. No problem. Add 1 teaspoon of Vital Wheat Gluten for every cup of unbleached all purpose flour. Next obstacle: more flavor. Plain bread is delicious but sometimes you need something more... so add it! Black olives and rosemary transforms this bread into an artisan masterpiece! Indeed, both a science and an art.


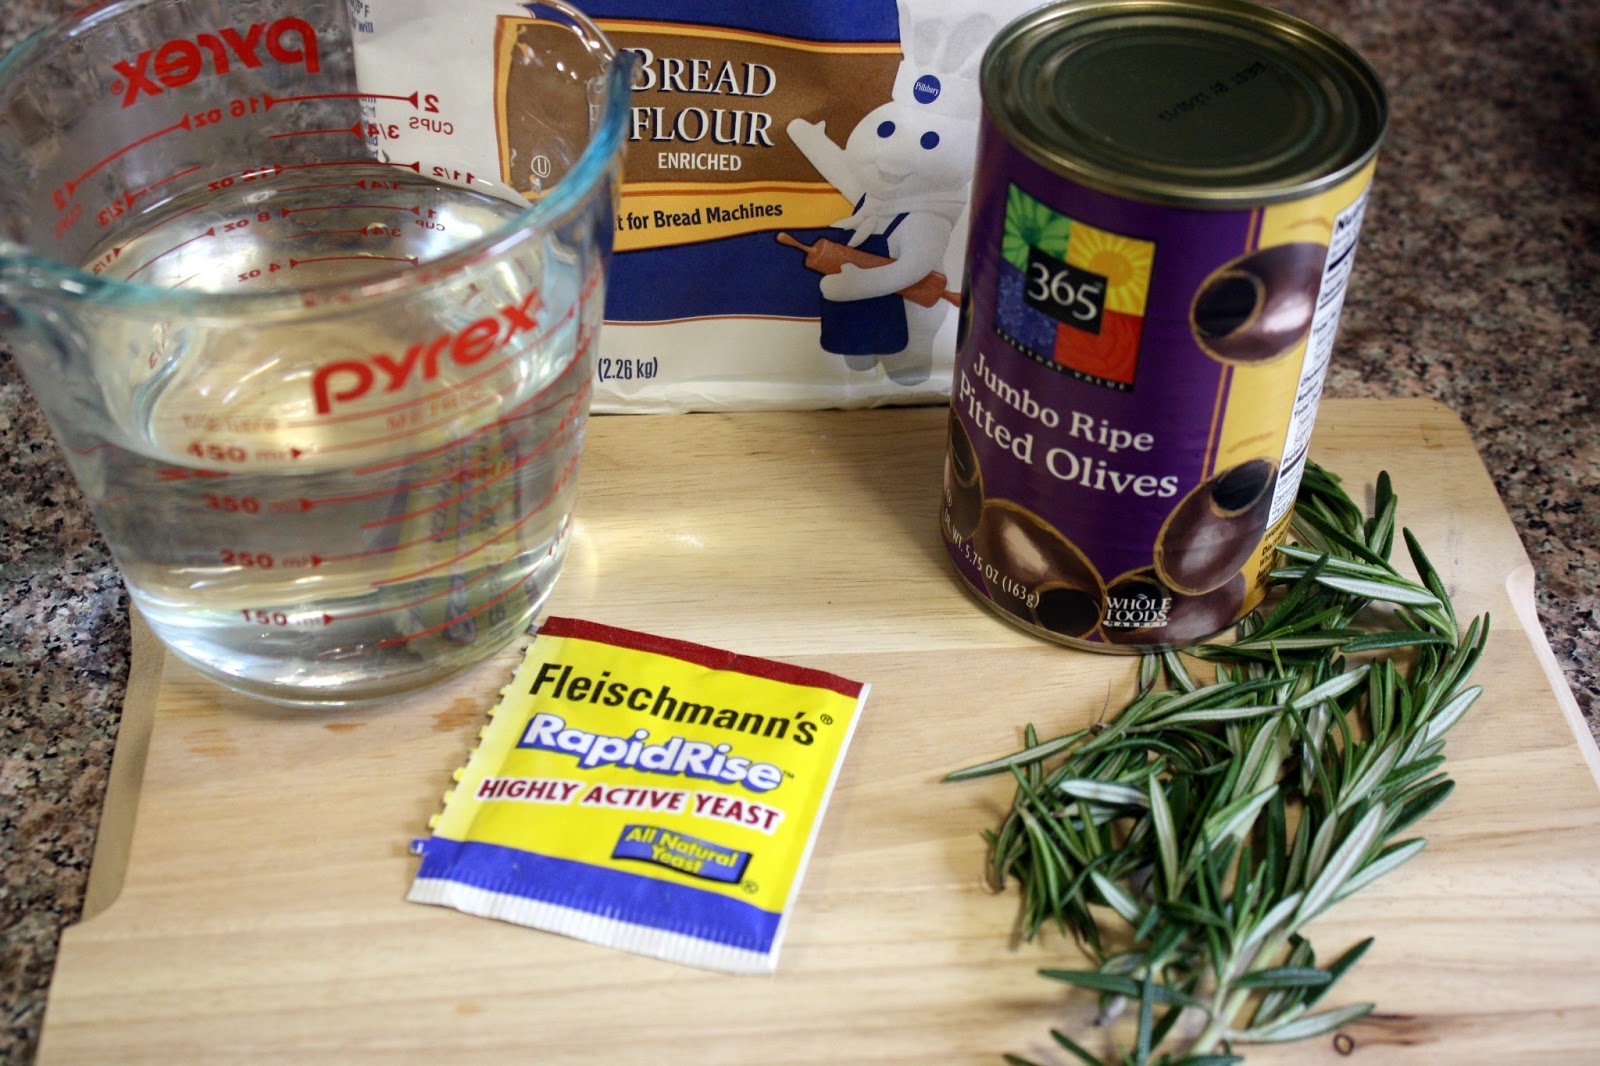
Ready to make olive and rosemary bread!


Well, almost ready. I only had 2 cups of bread flour. No problem! 
One cup of unbleached all-purpose flour + 1 teaspoon of vital wheat gluten!


Finely chop fresh rosemary. 
No one likes a long piece of rosemary. 
Trust me on that one.


How much rosemary? I used about a tablespoon because I didn't want it to 
overwhelm the olives... if you love rosemary, go for more!


About a cup of large black olives, quartered


Incorporate the olives and rosemary into the dough and place it into a bowl greased with olive oil. Cover it with plastic wrap.


Let it stand for at least 4 hours... no need to watch it. It will rise.


Knead the dough for a bit, cover with plastic wrap and let it rest for another 30 minutes


Preheat oven & your baking vessel to 450 degrees. 
(I ended up swapping this pot out for a smaller square ceramic vessel)


Remove hot baking vessel from oven. Gently round out your dough and place it into the vessel. Cut an "X" into the top with a sharp knife to let it bloom.


Freshly Baked Black Olive & Rosemary Bread


Fantastic crust with a tight crumb and slight chew. Perfect!
Black Olive & Rosemary Bread


Black Olive & Rosemary Bread

Adapted from Mark Bittman's Speedy No-Knead Bread

Ingredients

2 cups bread flour
1 cup unbleached all purpose flour
1 teaspoon Vital Wheat Gluten1 packet (1/4 ounce) instant yeast
1 1/2 teaspoons salt
1 1/2 cups lukewarm water
1 cup large black olives, drained and quartered
1 tablespoon fresh rosemary, finely chopped
Olive Oil for bowl

Directions

1. Combine flours, gluten, yeast and salt in the bowl of a stand mixer.
2. Add water. With a dough hook attachment and mixer on med/low, combine until blended. Dough will be shaggy.
3. Add olives and rosemary. With your hands, combine until incorporated. (some of the olives will stick out and that's fine.)
4. Place dough into a large bowl, greased with olive oil. Cover and let stand for 4 hours, at room temperature. (You can let it stand for 8 hours and it will not over-proof)
5. In the same bowl, knead dough a little bit. Just a minute or so to let out some air. 
6. Cover bowl with plastic wrap and let rest another 30 minutes.
7. Preheat oven to 450 degrees, with your cooking vessel inside: 6-to-8-quart heavy covered pot (cast iron, enamel, Pyrex or ceramic).
8. Carefully remove vessel from oven. Smooth the dough into a ball and place it into the baking vessel.  
9. With a sharp knife, cut an "X" into the top of the dough to let the bread bloom when it bakes.
10. Cover with lid and bake 30 minutes, then remove lid and bake another 15 to 30 minutes, until loaf is beautifully browned. Cool on a rack.

Eat, Drink & Be Yummy!