Showing posts with label Shipping. Show all posts

Monday, November 26, 2012

Lemon Crinkle Cookies


One of my (many) weaknesses are sugar cookies.  I can't seem to perfect them.  Sometimes I get the dough right, but then have a hard time rolling them out into an even thickness.  Or I mess up the cookie cutters... Or the cutting part works out well, but the cookie itself is dry.  ::sigh::  While I continue to work on a butter cookie recipe that will work for me time and time again, I will continue to ROCK cookies that DO NOT have to be cut with cookie cutters!

Lemon Crinkle Cookies

These lemon crinkle cookies can be eaten immediately or kept in an airtight container up to a week; although you'll see them disappear long before that!  These are fantastic for cookie sharing parties or for holiday presents. Their flavor flexibility also extends beyond any single season... they're perfect anytime!

Combine wet ingredients in a stand mixer, or with a hand held mixer


Combine dry ingredients in a bowl and mix to incorporate.


Stir in dried ingredients, just long enough to combine.
Use a spatula to scrape down the sides of the bowl


Roll dough in powdered sugar


Place cookie balls on parchment paper lined baking sheet


Baked cookies


mmmmm.... Lemon Crinkle Cookies


Cooling the cookies before they're devoured!


Lemon Crinkle Cookies

Makes about 7 dozen teaspoon cookies or about 2.5 dozen Tablespoon cookies

Ingredients

1 cup butter, room temperature
2 cup granulated sugar

1 teaspoon vanilla extract
2 whole eggs
1 Tablespoon lemon zest
2 Tablespoon fresh lemon juice
1/2 teaspoon salt
1/2 teaspoon baking powder
1/4 teaspoon baking soda
3 cups unbleached all-purpose flour
½ cups powdered sugar in a shallow bowl (for rolling)

Directions

Preheat oven to 350 degrees. 

1. Cream butter and sugar in a stand mixer until light and fluffy, about 2-3 minutes. 
2. Whip in vanilla, egg, lemon zest, and juice. 
3. Sift together all dry ingredients (except for the powdered sugar).
4. Add dry ingredients to stand mixer and mix to combine.
5. Using a teaspoon measuring spoon or ice cream scoop, measure out dough. Roll them into a ball in your hands and then cover in powdered sugar.
6. Repeat ball making, placing each ball at least 2 inches apart on baking sheet.
7. Bake for 10 minutes, or until bottoms are barely brown  and the top has softly crinkled.
8. Remove from oven and let cool on baking sheet for 2-3 minutes before transferring to cooling racks.

Wednesday, November 7, 2012

Shortcut Mocha Macadamia Biscotti

You ever read a beach-read novel that talks about food so much that it actually includes recipes at the end of the book?  No?  Me neither... until a few weeks ago. The recipe for biscotti seemed so easy. Too easy. So easy that I had to try it.  

The super secret shortcut?  Boxed cake mix! The same boxed cake mix that I'm always tempted into buying and that stands in my pantry until I throw it out, usually opting to make a from-scratch cake.

The result FAR surpassed the ease of the recipe. Next time, and there will be a next time, the only change that I will make will be to create two blocks of dough, rather than one large rectangle.  The resulting cookies will be easier to manipulate and heck, they'll look cuter!


Add macadamia nuts to the dough

Shape into a rectangle
(or as close to an oval-ish rectangle as you can get it)


Baking the biscotti after they've been cut into slices and each slice in half


Mocha Macadamia Biscotti, ready to be shipped (or eaten immediately)

Mocha Macadamia Biscotti


Ingredients

1 package butter or white cake mix
2 TBSP Dutch process cocoa
1 TBSP instant espresso
1 TBSP instant coffee
½ cup all purpose unbleached flour
½ cup butter, melted
2 eggs

½ cup macadamia nuts, coarsely chopped

Directions

Preheat oven to 350º F. 
1. Cut parchment paper to fit large cookie sheet.
2. In a large bowl, blend dry ingredients for biscotti. 
3. Add eggs and blend just to mix.
4. Add melted butter into biscotti mixture. Blend until thoroughly mixed.
5. Add the macadamia nuts. Continue to blend until thoroughly mixed.

6. Using your hands, shape the dough into a log and lay it on the parchment paper. Roll it out to approximately 5” wide and ½” thick. Shape into a rectangle. (I would make two rectangles next time.)
7. Bake for 25 minutes.
8. Remove pan from oven and cool for 20 minutes.
9. Cut biscotti into even horizontal strips, approximately 1” wide. 
10. Lay each biscotti on its side on the cookie sheet, leaving space between each one.
11. Bake at 350º F for another 10 minutes, then lower the oven heat to 200º F and continue baking for another 40 minutes. 
12. Cool on wire rack.

Eat, Drink & Be Yummy!

Saturday, October 27, 2012

Baked Apple Cider Donuts

I want to believe that there will be world peace one day. I want to believe that Yankees fans will one day embrace Mets fans. But more than anything, I want to believe that *not* everything tastes better when it's deep fried.  

Could it be true?  Can something as magical as doughnuts be delicious without the deep fat fryer?  Indeed.  Baked apple cider donuts come out fluffy, moist and cakey... with a slight crusty sugar coating.  

While this isn't quite solving the problems of the world, it did provide the family with a considerably less guilty version of a fall classic treat!


Gently combine the wet and dry ingredients. Don't over mix.

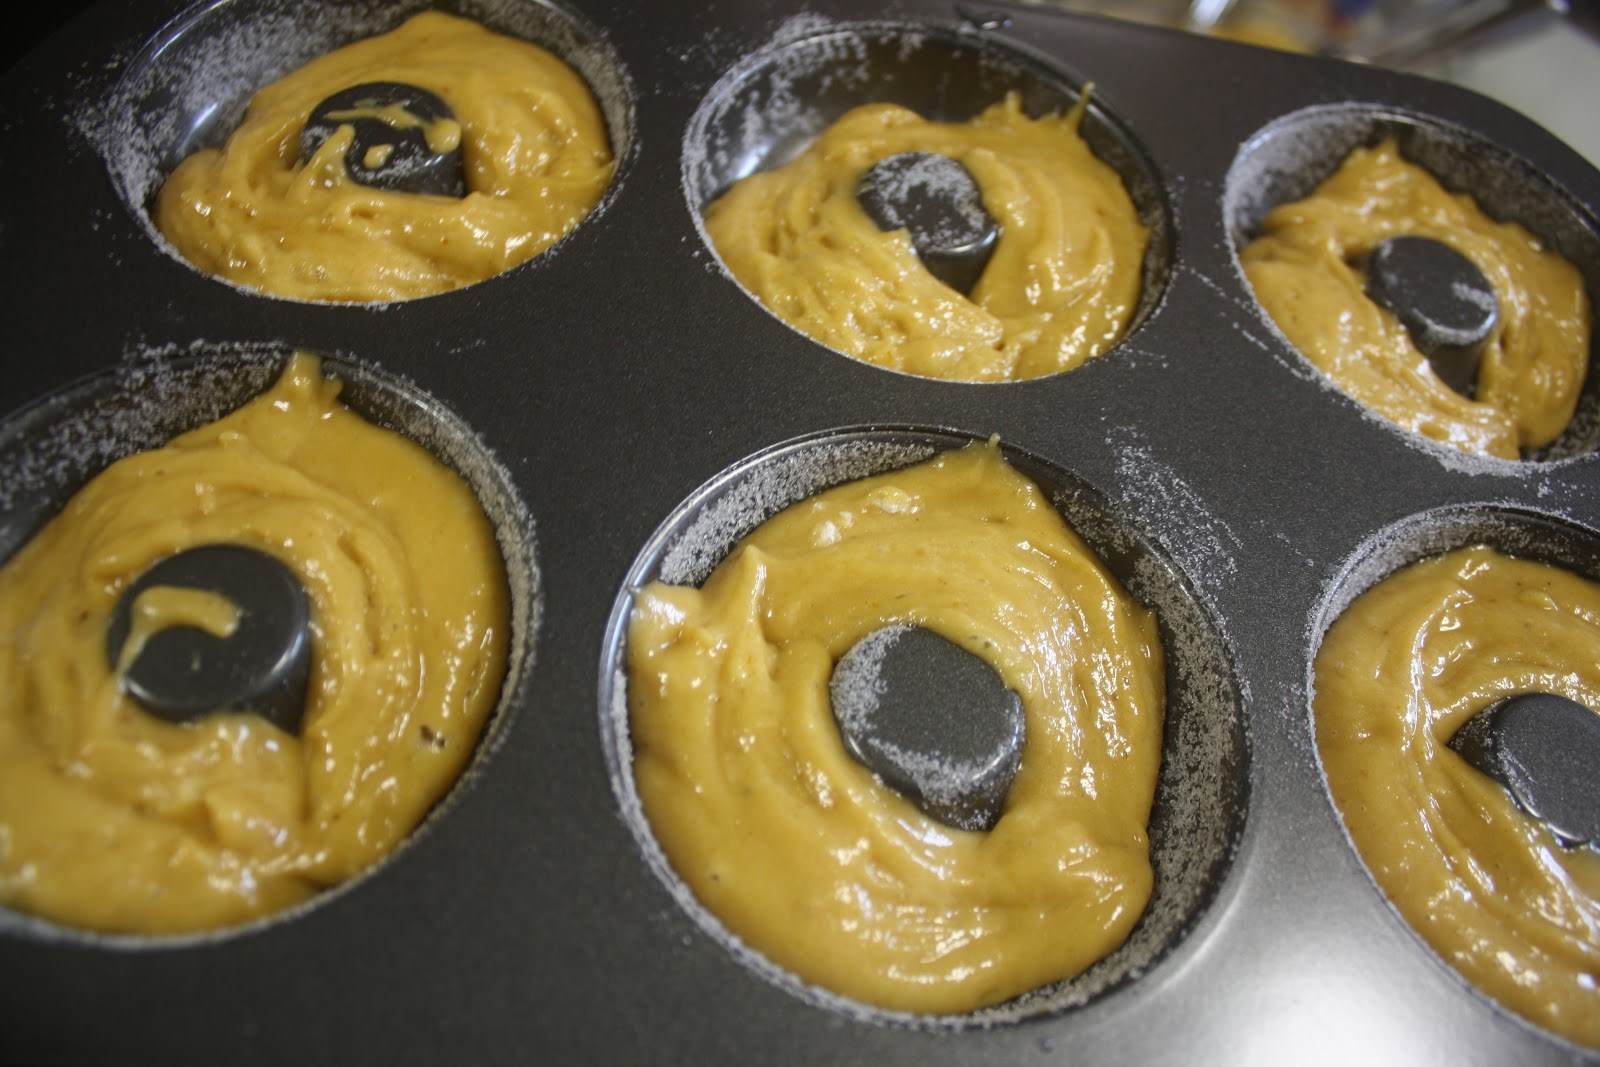
Oil the donut cavities and sprinkle granulated sugar to coat


Fill with 2 TBSP of donut mixture

Allow to cool and gently twist out of mold.

Baked Apple Cider Donuts

Baked Apple Cider Donuts


Adapted from Recipe Girl

Yield: 18 donuts (based on Wilton's 6 cavity doughnut pan)


Ingredients:
2 cups all-purpose flour
1 1/2 teaspoons baking powder
1 1/2 teaspoons baking soda
1/2 teaspoon salt
1 large egg, beaten
2/3 cup packed brown sugar
1/2 cup Trader Joe's Pumpkin Butter (substitute with apple butter*)
1/3 cup pure maple syrup
1/3 cup Trader Joe's Spiced Apple Cider (substitute with apple juice*)
1/3 cup plain nonfat yogurt
3 tablespoons vegetable or canola oil

vegetable or canola oil for preparing pans

granulated sugar for preparing pans

*NOTE: If you substitute apple butter for TJ's Pumpkin Butter or if you substitute apple juice for TJ's Spiced Apple Cider, add 2 teaspoons of cinnamon and 3/4 teaspoon of nutmeg to batter.

Directions:
1. Preheat oven to 400°F. 
2.Coat pan with nonstick spray or oil, spreading with a napkin square. Sprinkle with sugar, shaking out excess.
3. In a mixing bowl, whisk together flour, baking powder, baking soda, and salt; set aside. 
4. In another bowl, whisk together egg, brown sugar, apple butter, maple syrup, cider, yogurt and oil. 
5. Add dry ingredients and stir just until moistened. 
6. Using a 1 TBSP ice cream scoop, place 2 TBSP of batter into each donut cavity.
7. Bake 10 minutes or until the tops spring back when touched lightly. 
8. Allow to cool for a few minutes. Gently turn the donut, loosening the edges and pull out.

Enjoy immediately or store in an air tight container for up to 3 days (if they last that long!)

Eat, Drink & Be Yummy!

Tuesday, October 23, 2012

Pumpkin Carrot Muffins with Craisins


Vegetables, Oh Vegetables....

I've done my best to NOT hide vegetables from my kids.  It feels almost as though I'm doing them a disservice to them by letting them think that their meal doesn't include vegetables.  

That being said, I'm not above throwing unexpected vegetables into different foods. We then play the "guess the hiding vegetable" game where the kids try to decipher the flavor, texture or color of what they're eating and figure out what's going on inside.


Here, I used a recipe from Deb Perelmen, Smitten Kitchen Goddess.  I've modified the recipe by adding three finely grated medium carrots and about 3/4 cup of craisins.  The result?  Moist, juicy and hey... the kids ate muffins AND CARROTS! 

These are great for breakfast, dessert or snack!  They also served as the "bonus item" to my weekly clients for the week of October 8, 2012.


Pumpkin Carrot Muffins with Craisins
1 1/2 cups all-purpose flour
1 teaspoon baking powder
1 cup canned solid-pack pumpkin (from a 15 ounce can)
1/3 cup vegetable oil
3 medium carrots, finely grated
3/4 cup craisins

2 large eggs
1 teaspoon pumpkin-pie spice*
1 cup, plus 1 tablespoon sugar
1/2 teaspoon baking soda
1/2 teaspoon salt
1 teaspoon cinnamon


Put oven rack in middle position and preheat oven to 350°F. Put liners in muffin cups.


Whisk together pumpkin, oil, eggs, carrots, craisins, pumpkin pie spice, 1 cup sugar, baking soda, and salt in a large bowl until smooth, then whisk in flour mixture until just combined.

Stir together cinnamon and remaining 1 tablespoon sugar in another bowl.

Divide batter among muffin cups (each should be about three-fourths full), then sprinkle tops with cinnamon-sugar mixture. Bake until puffed and golden brown and wooden pick or skewer inserted into the center of a muffin comes out clean, 25 to 30 minutes.

Cool in pan on a rack five minutes, then transfer muffins from pan to rack and cool to warm or room temperature.

*I didn't have pumpkin pie spice, so I threw together about 1/4 tsp each of: cinnamon, allspice, ground ginger and some freshly grated nutmeg.


Eat, Drink and Be Yummy!

Tuesday, October 16, 2012

Roasted Hazelnut Chocolate Spread (NUTELLA!!)

Working on my survivalist skills. In case we sever relations with Italy (and Canada), I'll be able to provide my family with Nutella!

Don't judge me. Everyone has their own definition of survival.

Great gift for the holidays!

Recipe taken from Leite's Culinaria.


http://leitesculinaria.com/78672/recipes-homemade-nutella.html


Hands-on time: 20 minutes | Total time: 30 minutes, not including time for cooling

Homemade Nutella Recipe

Ingredients

  • 1 cup hazelnuts
  • 12 ounces milk chocolate, chopped
  • 2 tablespoons mild vegetable oil, such as canola
  • 3 tablespoons confectioners’ sugar
  • 1 tablespoon unsweetened cocoa powder
  • 1/2 teaspoon vanilla extract
  • 3/4 teaspoon salt, more or less depending upon your preference

Directions

  • 1. Preheat the oven to 350°F (176°C).
  • 2. Spread the hazelnuts in a single layer on a baking sheet and toast them in the oven for about 12 minutes, until they’ve browned a little and the skins are blistered a little. Wrap them in a kitchen towel and rub vigorously to remove as much loose skin as possible. (Some skin will cling to the nuts when you’re done. It’s okay—not to mention inevitable.) Let cool completely.
  • 3. Melt the chocolate in a saucepan over gently simmering water or in the microwave. Stir until smooth. Let cool completely.
  • 4. In a food processor, grind the hazelnuts until they form a paste. Add the oil, sugar, cocoa powder, vanilla, and salt and continue processing until the mixture is as smooth as possible–or as smooth as you like. Add the melted chocolate, blend well, and then strain the mixture to remove any chunks of hazelnut that remain. The resulting homemade Nutella will be thin and somewhat runny and maybe even a little warm but it will thicken as it cools. Scrape your homemade nutella into a jar or other resealable container and let it cool to room temperature. Cover the container after snitching several spoonfuls. The nutella will keep on the counter for up to 2 weeks. (Hah!)
Eat, Drink and Be Yummy!

Monday, October 15, 2012

Mail-Ready Espresso Chocolate Chip Meringues


The next few days are going to be the equivalent of writing out my holiday wish list!

Working on a list of holiday shipping-ready sweets.  Here's the first item to make the cut: Giada De Laurentiis' Espresso Chocolate Chip Meringues.  

They're crunchy pillows of goodness, and they travel very well...


Recipe link:  

No adaptations have been made to Giada's recipe:

Ingredients

Directions

*Can be found at specialty cooking stores
Place an oven rack in the center of the oven. Preheat the oven to 300 degrees F. Line a baking sheet with parchment paper. Set aside.
In a stand mixer fitted with the whisk attachment, beat the egg whites and salt until frothy, about 1 minute. With the machine on medium-high speed, gradually add the sugar, about 1 tablespoon at a time. Add the cream of tartar, vanilla extract, and espresso powder. Increase the speed to high and beat until the mixture is thick and holds stiff peaks, about 3 to 5 minutes. Using a spatula, fold in the chocolate chips. Drop 1/4 to 1/2 cup of the mixture onto the prepared baking sheet about 2 inches apart. Bake for 30 minutes. Rotate the pan and bake for another 30 minutes. Turn off the oven and allow the meringues to cool completely while still in the oven, about 2 hours.
Store airtight in a plastic container for up to 4 days.
Cook's Note: The meringue mixture can also be placed in a pasty bag fitted with a large, plain tip (recommended: Ateco # 9808) and piped onto the baking sheet.

Eat, Drink and Be Yummy!