Showing posts with label Desserts. Show all posts

Friday, March 29, 2013

Super Fluffy Apple Banana Matzo Muffins

Every year during Passover, abstaining from baked goods isn't difficult... until the second day. And then the third day... These days, there are lots of store bought options as well as fantastic ideas online available to those that observe the holiday. 


Fluffy Apple Banana Matzo Muffins


These muffins are so yummy that you will want to make them with all of the extra matzo cake meal that you have left over from the holiday! Go ahead and do it... no one will know that these were intended to be Passover-friendly!


Always trying to get a better shot... Apple Banana Matzo Muffins


Super Fluffy Apple Banana Matzo Muffins

Makes approximately 20 muffins (depending on the size of your muffin pan and how full you fill each pocket)

Ingredients

1 2/3 cups all purpose matzo cake meal
1 1/2 teaspoon baking soda
1/4 teaspoon ground cinnamon (optional)
1/2 teaspoon salt
1 cup plus 2 tablespoons sugar
2 eggs
2 egg whites
1/2 cup apple sauce
3 1/2 bananas, very ripe, mashed
1 Gala apple, coarsly grated
2 tablespoons creme fraiche (or sour cream)
1 teaspoon vanilla extract

Canola oil for muffin tin (spread with a small napkin) or Non stick cooking spray


Directions

Preheat oven to 350 degrees F. 
Line muffin tin with liners or spray with non-stick cooking spray or wipe each pocket with a napkin and canola oil.

1. Sift together the flour, baking soda, cinnamon (optional) and salt. 
2. Beat sugar, eggs and egg whites with a whisk until light and fluffy, about 10 minutes. 
3. Add apple sauce, mashed bananas, grated apple, creme fraiche, and vanilla. 
4. Fold in dry ingredients.
5. Fill each muffin pocket about 2/3 full.
6. Bake 22 to 25 minutes, until toothpick in center comes out clean.

Eat, Drink & Be Yummy!

Monday, February 25, 2013

Carrot Creamsicle Milkshake


While this doesn't qualify as a healthy dessert (it's a straight-up milkshake, guys), it serves a purpose. A friend asked me to make a milkshake with vegetables. Her daughter refuses all visible vegetables and she was looking for some stealthy maneuvers. She was thrilled that this milkshake got two carrots into her daughter whereas before, the carrot count would have been zero.

There's no detectable carrot flavor and a minimal change in color. The kids will think that the color came from the orange ;) There's still plenty of flexibility in the recipe. Use chocolate ice cream! Use lower fat milk! Add more orange juice!  Add more carrots! You're going to love it!

Carrot Creamsicle Milkshake


My own taste testers approved.
I was voted "Best Mama" by the after-school crowd 


Carrot Creamsicle Milkshake
(orange was washed out in this picture. I liked the one on top of the page better)


Carrot Creamsicle Milkshake

Makes approximately 24 ounces

Ingredients

1 pint vanilla bean ice cream, softened
4 medium sized carrots
zest of 1 orange
Juice of 1/2 orange
pinch Kosher Salt
1 cup whole milk (or more if you prefer a thinner milkshake)

Directions

1. Take ice cream out and leave it on the counter while you prepare the other ingredients.
2. Peel the carrots and boil them in salted water until soft.
3. In a blender (if you're using an immersion blender, put the ingredients into a tall cup) combine ice cream, soft carrots, orange zest, orange juice and pinch of Kosher salt. 
4. Blend until there aren't any visible carrot pieces. 
5. Add whole milk and blend to combine.

Eat, Drink & Be Yummy!

Saturday, February 23, 2013

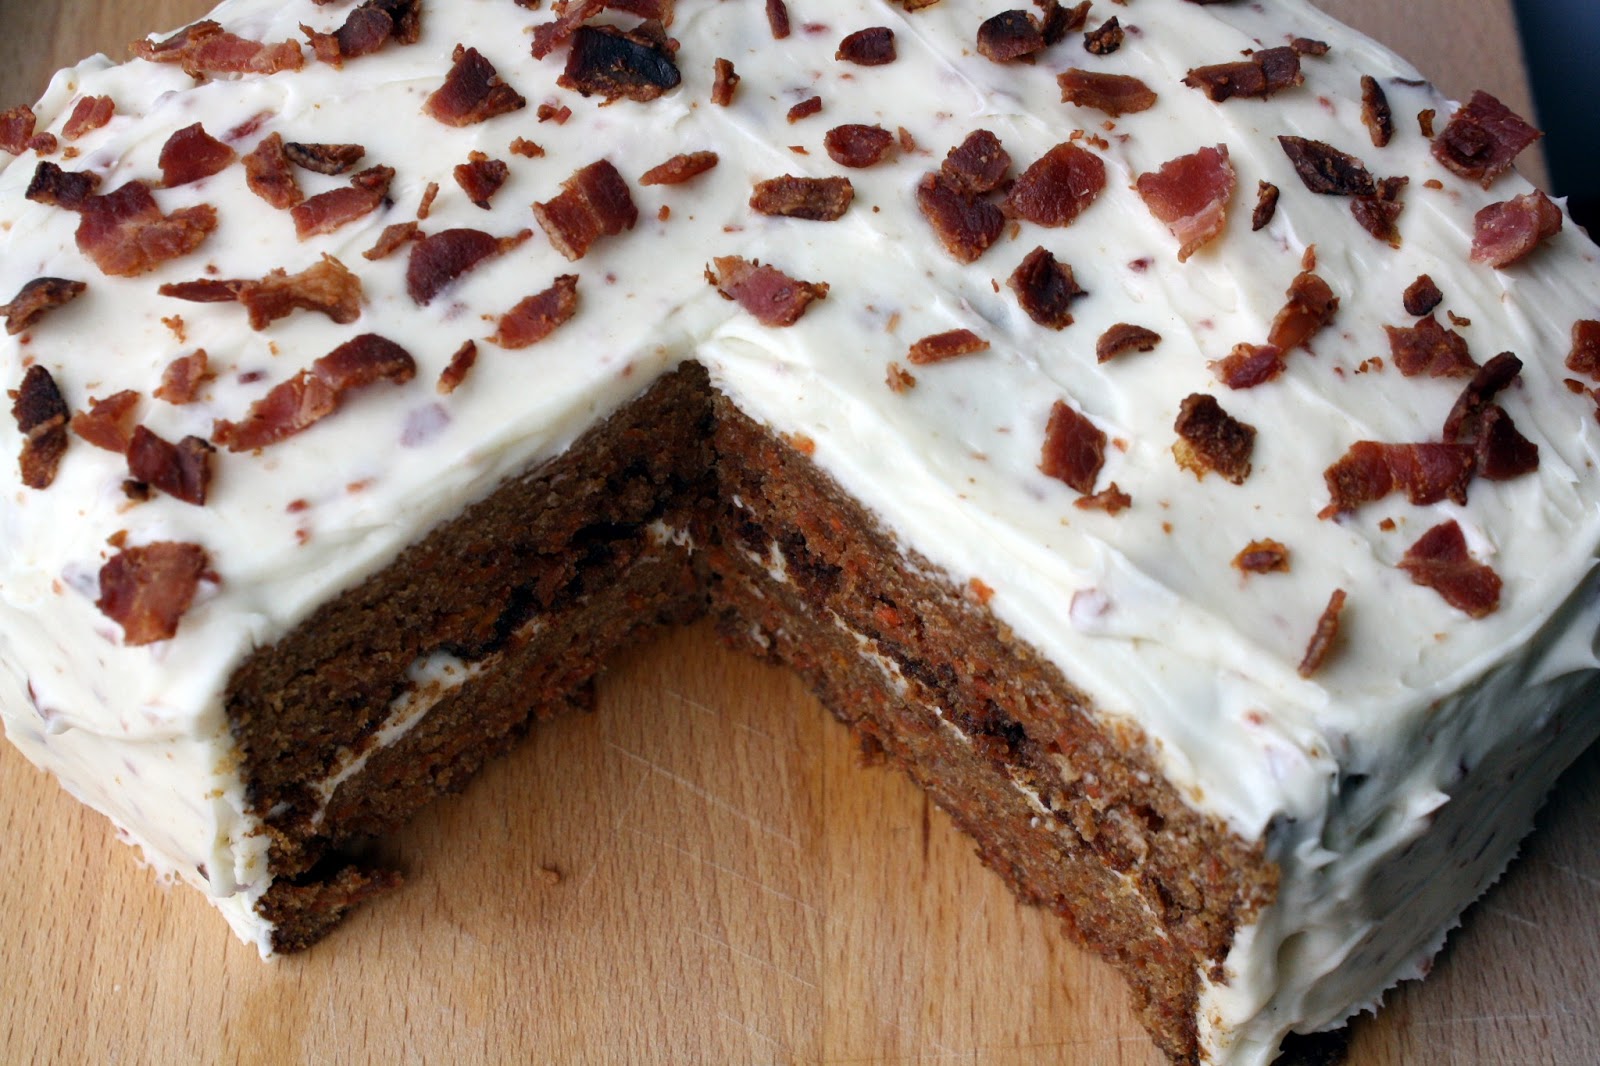
Gluten Free Carrot Cake with Bacon Cream Cheese Frosting


Our family motto is "Bacon and Butter Make Everything Better". When both of those ingredients combine in a single dish? Magic!

Gluten Free Carrot Cake with Bacon Cream Cheese Frosting

I'm really picky about my carrot cake. I like it with carrots, but some people add nuts. Others use coconut. And yet others include raisins. I'm a purist. It's a Carrot Cake. Not a Carrot-Nut- Raisin-Coconut Cake. If you insist on the additional elements when you make this cake, go for it! But I'm a simple girl.

When it comes to the frosting though... well, I'm more than happy to experiment. The salty and smokey addition of bacon compliments the sweetness of the cream cheese. You'll love it!
Getting ready to pull it all together...


Sift the dry ingredients (just noticed my reflection in the sifter! Ha!)


Add butter/oil, applesauce (I used strawberry applesauce) and vanilla to the beaten sugar and eggs.


Shredded Carrots. Definitely worth getting the food processor out of the cabinet.


Combine shredded carrots with cake batter.


Gluten Free Carrot Cake with Bacon Cream Cheese Frosting


Gluten Free Carrot Cake with Bacon Cream Cheese Frosting

Gluten Free Carrot Cake:

Ingredients

2 cups sugar
4 eggs

8 ounces (2 sticks) butter, melted or your favorite vegetable/canola oil
1/2 cup apple sauce
2 cups all-purpose gluten-free flour
2 teaspoons baking soda
2 teaspoons gluten-free baking powder
1 teaspoons cinnamon
1 teaspoon salt
2 teaspoons vanilla extract
1 pound carrots, grated


Directions

Preheat oven to 350° F
This recipe makes: two 9" round cake pans, one 9"x13" pan or muffin/cupcake tins (makes 36). I used two 8"x8" square cake pans. Grease your baking vessel or line your muffin/cupcake tins.
1. Beat sugar and eggs in a large mixing bowl with an electric beater or in a stand mixer. 
2. Add butter (or oil) and vanilla and beat until smooth. 
3. In a large bowl, combine gluten-free flour mix, baking soda, baking powder and salt. Sift to combine. (Using a sifter will allow for a lighter cake texture. If you don't have a sifter, whisk well) 
4. Add the dry ingredients to the wet ingredients and beat until blended.
5. Stir in grated carrots. 
6. Pour the batter into prepared pans.
7. Bake for 40-55 minutes (depending on the size of your baking vessel), until a toothpick comes out clean. Cupcake cooking time is 30-35 minutes.
8. Let completely cool before removing from pan and before icing.


Bacon Cream Cheese Frosting:

Ingredients

8 ounces (2 sticks) unsalted butter, room temperature
12 ounces cream cheese, room temperature
1 pound confectioners' sugar, sifted
3/4 teaspoon pure vanilla extract
12 ounces bacon

Directions

Preheat oven to 450 degrees.
1. Line a baking sheet with foil. Lay out bacon in a single layer.
2. Bake the bacon for 15 minutes, until fragrant and crispy.
3. Remove from oven, cool on a paper towel lined plate.
4. Finely chop all but two slices of the bacon (to incorporate into the frosting).  The other two slices should be coarsely chopped (to top the frosting).
5. Beat butter and cream cheese with a mixer on medium-high speed until fluffy, 4-5 minutes. 
6. Add confectioners sugar, in thirds. Beat at low speed until incorporated. Repeat until all confectioners sugar has been incorporated.
7. Add vanilla and mix to incorporate.
8. Add finely chopped bacon. With a wooden spoon, mix to combine.

Build your cake:
1. Place bottom layer on a cake plate. 
2. Spread 1/3 of the frosting on the top of the cake.
3. Place the second layer on top of the frosted bottom layer.
4. Spread remaining 2/3 of the frosting on the top and sides of the cake.
5. Refrigerate for at least 2 hours and up to 3 days.

Eat, Drink & Be Yummy!

Friday, February 15, 2013

Chocolate Espresso Cake with Dark Chocolate Ganache


Taking a moment to compare baking a chocolate cake to having kids:
     1. Sometimes, baking a cake takes longer than labor. Truth.
     2. 
A "labor of love" is equally relevant to childbirth and baking this cake. 
     3. It's (almost) possible to love chocolate cake as much as your child.

This is a time consuming and labor intensive recipe, but the result is well worth the effort. The cake is moist and fluffy and holds up very well to the amazing buttercream. The ganache? Well, ganache makes everything better, doesn't it? Don't just take my word for it, try it!


Chocolate Espresso Cake with Dark Chocolate Ganache


Chocolate Espresso Cake with Dark Chocolate Ganache

Adapted from Williams Sonoma


Cake:

¾ cup dark unsweetened cocoa powder
⅔ cup sour cream

1 ¼ cups hot water
2 ⅔ cups all-purpose flour
2 tsp baking powder
1 tsp baking soda
½ tsp salt
¾ cup (1 ½ sticks) unsalted butter, cut into 1-inch cubes, softened
½ cup vegetable shortening
1 ½ cups granulated sugar
1 cup firmly packed dark brown sugar
3 large eggs, at room temperature
1 tbs pure vanilla extract

Preheat oven to 325 degrees.
1. In bowl, mix cocoa powder, sour cream and hot water. Set aside to cool. 
2. In a separate bowl, sift together flour, baking soda, baking powder and salt. Set aside.
3. In mixer, beat butter and shortening together until fluffy, about 5 minutes
4. Add sugars and beat 5 more minutes. 
5. Add eggs, one at a time. 
6. Add vanilla, beat on low until incorporated. 
7. Add dry ingredients, alternating with cocoa mixture, in three parts, ending with dry, into mixer bowl. 
8. Divide batter into 3 round pans, buttered under and over parchment paper and dusted with flour.
9. Bake 35 to 40 minutes. Cool for 45 minutes, then remove from pan, and cool completely.


Buttercream

1 ½ cups granulated sugar
1/3 cup all-purpose flour
1 ½ cups whole milk
1/3 cup heavy cream
1 ½ cups (3 sticks) unsalted butter, soft but cool, cut into small pieces
3 tablespoons pure vanilla extract
2 tablespoons instant espresso powder

1. In heavy sauce pan, whisk sugar & flour, then add milk & cream. 
2. Cook over medium heat, whisking occasionally, until mixture comes to a boil and thickens, about 10-15 minutes. 
3. Transfer to mixing bowl, and mix on high with paddle attachments until cool. 
4. Reduce speed to low, add butter. Mix on high until fluffy, about 1-2 minutes. 
5. In a small bowl, combine the vanilla extract and espresso powder. Stir until dissolved.
6. Add vanilla and espresso mixture to buttercream. Mix to incorporate.

Assemble:

1. Place bottom cake layer on plate and trim top to be level. Spread 1.5 cups frosting. 
2. Add next layer, trim and frost. 
3. Add third layer, frost top and sides, with thin layer of frosting. 
4. Place in fridge for 15 minutes. 
5. Then spread cake with remaining frosting, & return to fridge for another 15 minutes.


Chocolate Ganache:

8 oz 60 to 72% dark chocolate, coarsely chopped
¾ cup (1 ½ sticks) unsalted butter, softened and cut into ½-inch pieces
1 tbs light corn syrup

1. Place chocolate, butter, & corn syrup in double boiler, stirring until completely melted & smooth. 
2.  Remove from heat and stir to slightly cool. 
3. Drizzle over cake. 
4. Place in fridge to harden glaze. 
5. Repeat glazing and refrigeration 3 times, allowing the glaze to coat the sides evenly.

Optional: Garnish with 10 to 12 chocolate-covered espresso beans. Good for 3 days, room temp or fridge.

Eat, Drink & Be Yummy!

Tuesday, February 5, 2013

Mexican Chocolate Tofu Mousse


Looking for a great tasting, no-bake dessert? Look no further! Mexican. Chocolate. Tofu. Mousse.

I found the original recipe in The New York Times when I was given the task of making dessert for a Mexican themed family party. When I think of Mexican food, I generally don't think about dessert. Nachos, yes. Flautas, maybe. Enchiladas, definitely! But not dessert... Your guest will never guess that you swapped out the heavy cream for silken tofu and neither will the kids! It's luscious and delicious with just a hint of spice (add more cayenne, to go bold!).

This recipe makes enough for a crowd. Feel free to make half of it. When I make it for a group of people, I refrigerate it in a large bowl and then scoop it out like ice cream. It's also a great dessert option for pot luck dinners!

Mexican Chocolate Tofu Mousse


Melt the chocolate in 30 second increments in the microwave.
Stir in between each 30 seconds.


Tofu
(Only use the blender if you're making half of this recipe) 


Combine all ingredients with the slightly cooled melted chocolate


Using an immersion blender... blend until smooth.  Refrigerate.


Mexican Chocolate Tofu Mousse

Mexican Chocolate Tofu Mousse

Makes 10 individual servings, or enough to feed a crowd
Adapted from Mark Bittman

Ingredients

1 cup sugar
1 cup boiling water
1 pound, 9 ounces silken tofu
12 ounces high-quality bittersweet or semisweet chocolate
1 1/2 teaspoons vanilla extract
1 teaspoon ground cinnamon, or more to taste
1/4 teaspoon ground cayenne, or more to taste

Chocolate shavings (optional)


Directions

1. In a large bowl, combine sugar and boiling water. Whisk a couple of minutes, until sugar is dissolved.  Let cool.
2. Melt chocolate Using either a double boiler or in the microwave, in 30 second increments. After each 30 second increment, stir chocolate.
3. Put all remaining ingredients (except for chocolate shavings) into the bowl. Using an immersion blender, purée until completely smooth. (If you make half of this recipe, you can do everything in a regular blender.)
4. Taste and adjust the spices, if you'd like more.
5. Divide among 10 cups or bowls, or leave in the large bowl and refrigerate for at least one hour.
6. Garnish with chocolate shavings, optional.

Eat, Drink & Be Yummy!

Thursday, January 24, 2013

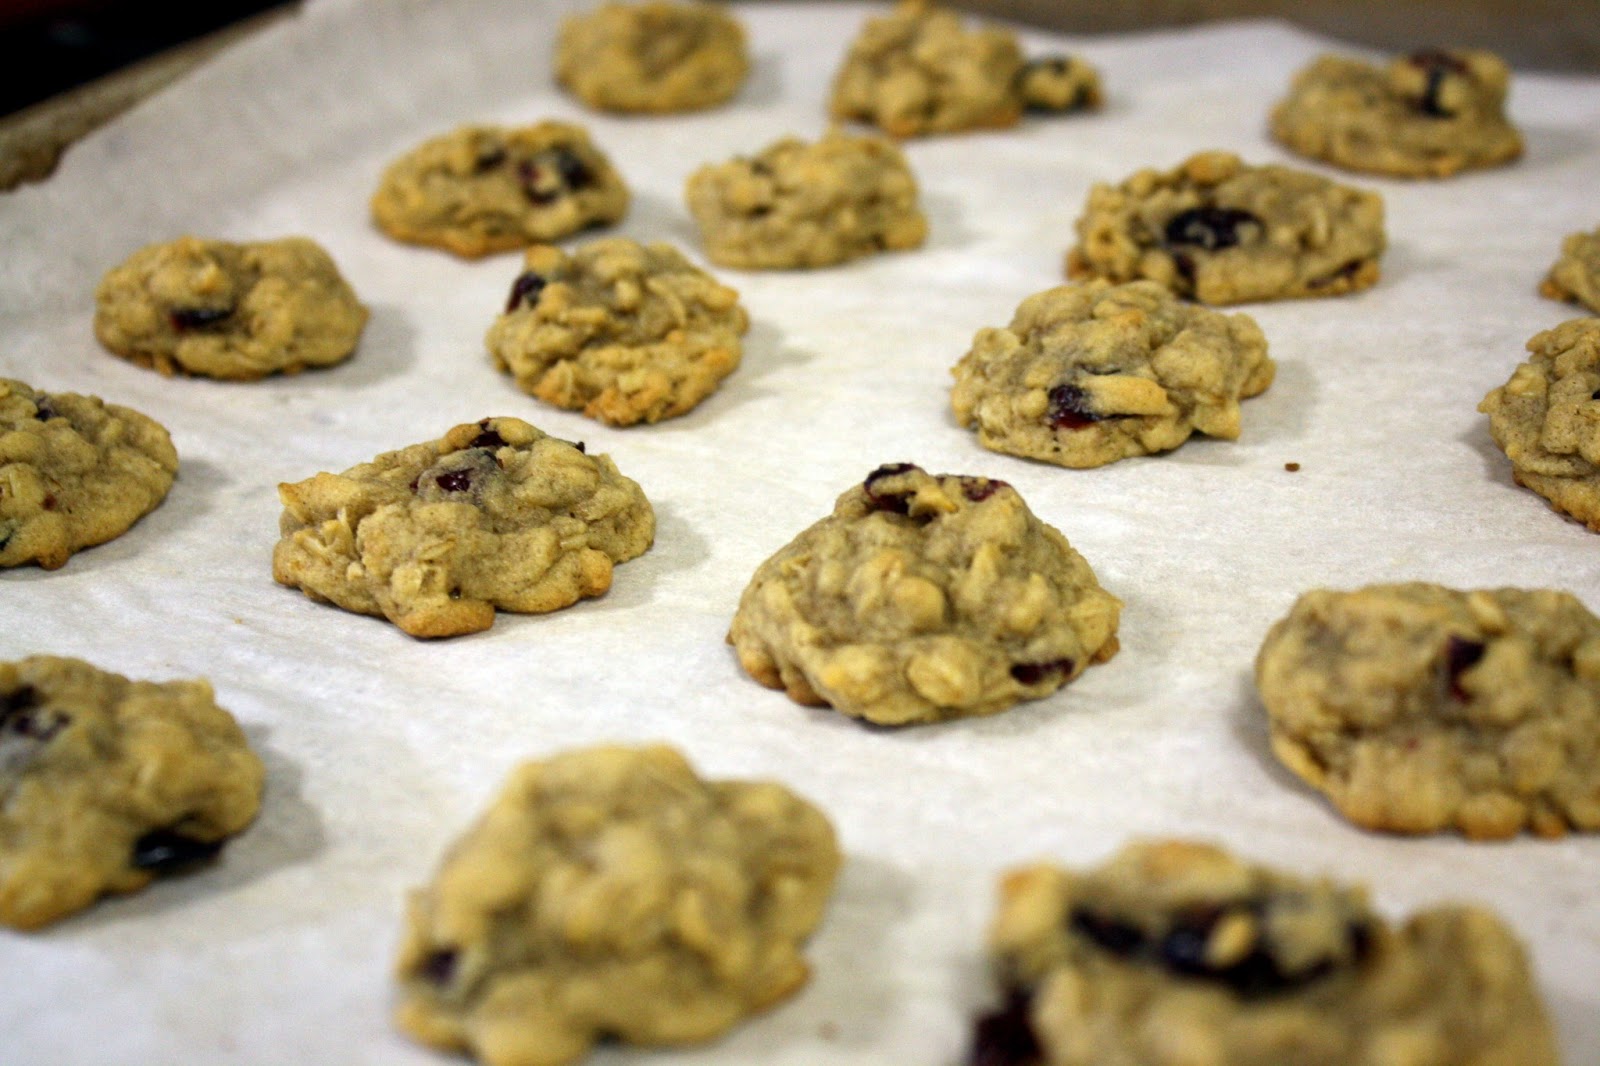
Oatmeal Craisin Cookie Bites


There's nothing that gives the illusion of "healthy" like combining oatmeal and dried fruit into a cookie. Let me be completely honest. Cookies are cookies. They are NOT healthy, so don't fall for someone's claim that they are. Oatmeal on it's own? Nutritional powerhouse! Fresh cranberries? Antioxidant superstars! But dry and sweeten those cranberries and combine them with oatmeal, butter, flour, eggs... you've got great tasting cookies!

I've been making this same recipe for more years than I should admit to. Sometimes with raisins, sometimes adding nuts. Sometimes I use a larger scoop to make bigger cookies (adjust the bake time accordingly). No matter how I've adjusted the recipe, it has never failed me. Enjoy!

Oatmeal Craisin Cookie Bites


Smaller cookies means less guilt... when you go back for a second and a third!


Oatmeal Craisin Cookie Bites

 Oatmeal Craisin Cookie Bites


Makes about 80 small cookies
Adapted from Emeril Lagasse

Ingredients

1 cup (2 sticks) unsalted butter, room temperature
3/4 cups sugar
3/4 brown sugar
2 eggs, room temperature
2 cups all purpose unbleached all purpose flour
1 teaspoon salt
1 teaspoon ground cinnamon
1 teaspoon baking soda
2 cups oatmeal (NOT INSTANT!!!)
1 teaspoon hot water
1 1/2 cups craisins
2 teaspoon vanilla extract

Directions

Preheat oven to 350 degrees F. Line a cookie sheet (or two) with parchment paper.

1. Add the butter and sugars into KitchenAid mixing bowl and cream with paddle attachment. Let it run for 2-3 minutes, scraping down the sides of the bowl, if necessary.
2. Add the eggs to the mixer and mix to combine. 
3. Add flour, salt, cinnamon, and baking soda. Mix well on low (2 speed). 
4. Remove the bowl from the mixer. Add the oatmeal, water, craisins, and vanilla.  Mix by hand. Don't overwork the dough.
5. Using a 1 1/2 teaspoon scoop, place 20-30 drops of dough on parchment paper lined baking sheet. Leave at least 1" in between cookie dough balls.
6. Bake for 7-9 minutes, until bottom starts to lightly brown. (8 minutes is the magic number for my oven)
7. Remove from oven and let stand for 2-3 minutes. Use a spatula and transfer to a cooling rack.
8. Store in an airtight container for up to 5 days.

Eat, Drink & Be Yummy!

Tuesday, January 22, 2013

Lemon Basil Sugar Cookies


There are a few things that I'm not very good at. One of them is rolling out sugar cookies. It's an unfortunate thing because I really LOVE sugar cookies. In all of the recipes and variations that I've attempted, I've never been able to pinpoint why I can't roll out a thin layer of dough and successfully cut it with a dinosaur shaped cutter. It's just not meant to be.

I love that you can see the basil and lemon zest. So pretty!!

This hasn't discouraged me from making sugar cookies though. My sugar cookies just aren't in fun shapes. They're round and that's how I like them. Round. Round sugar cookies are just as delicious as cowboy boot cookies. At least that's what I'll continue telling myself (and the kids) until the day that I'm able to master cookie cutters. At that point, I'm sure that I'll go into deep philosophical discussions about how heart shaped cookies taste superior to fire truck cookies.  In the meantime, I'm just happy to eat sugar cookies!

This is Alton Brown's basic sugar cookie recipe that has been modified a bit to add some UMPH. It's versatile enough to take on a wide variety of flavors.  Here I've added lemon zest, lemon juice and basil. 

Lemon Basil Sugar Cookies


Lemon Basil Sugar Cookies

Ingredients

3 cups all-purpose flour
3/4 teaspoon baking powder
1/4 teaspoon salt
1 cup unsalted butter, softened
1 cup sugar
1 egg, room temperature, beaten
1 tablespoon milk
1 teaspoon lemon extract (substitute vanilla if you don't have lemon)
Zest from 1 lemon
Juice from 1 lemon
4 pods frozen TJ's basil (or about 2 tablespoons of very finely chopped fresh basil)


Directions

Preheat oven to 375 degrees F.
1. Put the basil pods on a plate and bring to room temperature (this will take about 15 minutes)
2. Sift together flour, baking powder, and salt. Set aside. 
3. Place butter and sugar in large bowl of electric stand mixer and beat until light in color. 
4. Add egg and milk and beat to combine. 
5. Add lemon extract, lemon juice, lemon zest and defrosted basil and beat to combine. 
6. Put mixer on low speed, gradually add flour, and beat until mixture pulls away from the side of the bowl. 
7. Line a baking sheet (or two) with parchment paper.
8. Using a 1.5 teaspoon ice cream scoop, scoop dough onto cookie sheet, leaving at least 1 inch between each dough ball. Bake for approximately 8 minutes, until the bottom just starts to brown. (Don't over brown. They'll harden as they cool down.)
9. Remove from oven and cool on a wire rack.

Eat, Drink & Be Yummy!

Friday, January 18, 2013

Meyer Lemon-Honey Tart with Salted Shortbread Crust


When I saw this recipe in Bon Appetit.com, I didn't quite realize that I was staring at the screen until one of my kids walked over to me and asked if I was alright. Yeah, that's how things happen around here. 

Meyer Lemon-Honey Tart with Salted Shortbread Crust

I'm posting the recipe from epicurious with only a few changes that I made. Since I'm not a brave improviser when it comes to baking, I stuck pretty closely to the original. I used the opportunity to take as many pictures as possible.

Note: From start to cool, this recipe took me the better part of 5 hours. Oh and then you have to refrigerate the tart for at least another 4 hours. Color me (and the kids) disappointed that we'd have to wait so long.


Butter. Butter is so beautiful.


Combine the room temperature butter with powdered sugar in a food processor.


Pulse to combine powdered sugar and butter.


Add dry dough ingredients to creamed butter.


When combined, it will look lovely and sandy.


Grease springform pan. I'm a simple girl. I use canola oil, spread with a small napkin.


Place sandy dough into greased springform pan.


Evenly spread dough on bottom of pan and 1 1/2 inches up the side


Combine honey, sugar and lemon zest. It will form a very rough sandy mixture.


Thinly slice one Meyer lemon (you can use a mandolin or super sharp knife).


Combine the sugar, honey and zest mixture with your Meyer lemon slices. Set aside for 30-40 minutes, until sugar has dissolved.


Three eggs and two yolks. Whisk those beauties until they're nice and frothy.


Dry ingredients for the filling. Unbleached AP flour, corn starch and salt.


Juice three Meyer lemons and one regular lemon to make 2/3 cup juice.


Combine wet (egg & lemon juice) and dry ingredients.


This is what the filling will look like 30-40 minutes later, when the sugar has dissolved. You'll pour this into your pie crust and bake at 300 degrees.


Meyer Lemon-Honey Tart with Salted Shortbread Crust

Meyer Lemon-Honey Tart with Salted Shortbread Crust

Adapted from epicurious.com

Crust:
Nonstick vegetable oil spray (I used 1 tablespoon of Canola oil, spread with a napkin square)
1 3/4 cups all-purpose flour (I used unbleached)
2 tablespoons cornstarch
1 1/4 teaspoons kosher salt
3/4 cup (1 1/2 sticks) unsalted butter, room temperature, cut into 1" pieces
2/3 cup powdered sugar


Filling and assembly:
1 Meyer lemon or thin-skinned regular lemon
1 cup sugar
3 tablespoons honey
1 tablespoon finely grated lemon zest
3 large eggs
2 large egg yolks
1/4 cup all-purpose flour (I used unbleached)
2 teaspoons cornstarch
1/4 teaspoon kosher salt
2/3 cup fresh lemon juice, preferably Meyer lemon (I used 3 Meyer lemons and 1 regular lemon)

Special equipment: A 9"-diameter spring form pan

Directions

For crust:
Coat springform pan with nonstick spray or canola oil spread with a napkin square. Whisk flour, cornstarch, and salt in a small bowl; set aside. Place butter and powdered sugar in a food processor. Pulse until mixture is smooth. Add dry ingredients to food processor and pulse until mixture resembles medium-size pebbles (dough will not come together completely). Transfer dough to prepared pan. Using your fingers, press dough evenly onto bottom and 1 1/2" up sides of pan. DO AHEAD: Crust can be prepared 1 day ahead. Cover and chill.

For filling and assembly:
Using a mandoline or a sharp knife and a steady hand, slice lemon into paper-thin rounds. Remove seeds. (If using a regular lemon, blanch slices in boiling water for 4 minutes, drain, and let cool before proceeding). Mix sugar, honey, and lemon zest in a medium bowl. Add lemon slices and toss to coat. Let sit until lemon is softened and sugar is dissolved, 30-45 minutes. DO AHEAD: Lemon slice mixture can be made 1 day ahead. Cover and chill.

Place rack in upper third of oven; preheat to 325°F. Bake crust until center is firm to the touch and edges are beginning to turn golden brown, 30-35 minutes.

When crust is almost done baking, whisk eggs and egg yolks in a medium bowl to blend. Whisk flour, cornstarch, and salt in a small bowl; add to egg mixture and whisk to combine. Whisk in lemon juice. Add lemon slice mixture; mix gently to combine.

Reduce oven temperature to 300°F. Pour filling into hot crust. 
(My time management and organization was a bit off when I made this. By the time the filling was ready, the crust had cooled. Because my crust was cooled, I had to increase my bake time to 37 minutes.) Bake until filling is set and slightly puffed around edges, 25-30 minutes. Transfer pan to a wire rack; let cool completely. Chill for at least 4 hours, then unmold. Serve cold. DO AHEAD: Tart can be made 2 days ahead. Cover and keep chilled.

Eat, Drink & Be Yummy!

Monday, January 7, 2013

Candied Ginger Baked Rice Pudding


Today I'm blogging about some of the ways that I intentionally use leftovers. The first was a savory dish that used leftover rice to create Sausage, Rice & Haricot Vert, a mouthwatering entree, can be found here.

Candied Ginger Baked Rice Pudding

This post brings me back to my NYT roots. We adapted Mark Bittman's recipe for baked rice pudding. When I have fresh ginger, I use it. When I don't, candied ginger is a pantry staple, so I always have a backup plan. Ginger adds a subtle little surprise in this rice pudding. It's unexpected sharpness is pleasant in this not-too sweet dessert. 

Makes for a great breakfast, snack or dessert!


Heat ginger, sugar and butter just until the butter melts


2 cups of cooked basmati rice into a baking dish


Add the cooled milk mixture to the rice


Candied Ginger Baked Rice Pudding

Candied Ginger Baked Rice Pudding

Adapted from Mark Bittman

Ingredients

2 cups milk
2 tablespoons (1/4 stick) unsalted butter, more for greasing pan
2 tablespoons Trader Joe's Candied Ginger, finely minced
3/4 cup sugar
Pinch salt
2 cups cooked rice
2 eggs, beaten

Directions

Preheat oven to 350 degrees.
1. In a small saucepan, over low heat, warm milk, butter, ginger, 3/4 cup sugar and salt just until butter melts; cool slightly. 
2. Butter a 4-to-6-cup baking dish; put rice in it.
3. Add eggs to cooled milk mixture and whisk; pour mixture over rice. 
4. Bake for 30 to 45 minutes, or until custard is set but still a little wobbly. 
5. Serve warm or at room temperature.

Eat, Drink & Be Yummy!