Wednesday, October 31, 2012

Baked Sweet Potato Fries

Paula Deen's been catching a lot of slack for being the food equivalent of a drug pusher for her encouragement to use butter in recipes.  In light of her recent diagnosis of diabetes, she's been crucified for it. Personally, I love Ms. Deen. In life, sometimes too much of a good thing really is good. No, it's better than good.

Truth of the matter is that Ms. Deen has some pretty awesome recipes out there.  Some that don't include butter at all and others that you can modify to your liking, sans butter, if you choose.

One of my favorites is Paula's recipe for Baked Sweet Potato Fries. When I found it, I thought that it was a great foundation.  It can be followed without deviation or it can be as flexible as you need it to be... and I like some flexibility with my recipes.

Cut and season sweet potatoes


Make sure not to crowd the baking sheet.
If crowded, the sides of the fries won't evenly cook.
No one likes a mushy fry.

I opted IN for the post-bake sprinkle of salt


Baked Paprika Sweet Potato Fries

Adapted from Paula Deen's Recipe


Ingredients


2 TBSP Olive Oil 
5 sweet potatoes, peeled and sliced into 1/4-inch long slices, then 1/4-wide inch strips
Kosher Salt

Paprika
Freshly ground pepper


Directions
Preheat oven to 450 degrees F.

1. Line two sheet trays with parchment paper or foil.
2. In a large bowl toss sweet potatoes with oil 
3. Sprinkle with salt, pepper and paprika.  Toss to coat.
4. Spread sweet potatoes in single layer on prepared baking sheet, being sure not to overcrowd. 
5. Bake for 15 minutes and rotate trays (swap top tray with bottom tray).
6. Bake for another 15 minutes until sweet potatoes are crisp outside and tender inside.
7. Let cool 5 to 10 minutes before serving.
8. Optional: sprinkle kosher salt when serving. 

Eat, Drink & Be Yummy!

Carrot & Zucchini Mini Muffins


Ah... baked goods and vegetables. I'm really trying to think back to a time when I didn't have the urge to grate a carrot into a cake or a muffin... and it must be before the kids were born. 

A few weeks ago, I saw culinary great Giada De Laurentiis make mini muffins with carrots and zucchini. Our mental telepathy connection was finally made!

Giada, being the goddess that she is, one upped me. She made her muffins mini (point of brilliance #1) and she made them gluten free (point of brilliance #2). While hers includes an icing, I chose to keep my muffins bare because we weren't going to eat them immediately and I wanted to keep them at room temperature. With the icing, I'd have to refrigerate them. As this was the first time that I made them, I followed her recipe pretty closely, only making a few adaptations.

Using a 1 ounce ice cream scoop, fill each mini muffin liner with 1 scoop.

These will keep in an airtight container for up to 3 days... if they last that long!

Gluten Free Carrot & Zucchini Mini Muffins

Adapted from Giada De Laurentiis' Recipe

Ingredients

1 cup almond flour
1/4 cup all purpose gluten free flour
1/4 teaspoon fine sea salt
1 teaspoon baking powder
1/2 teaspoon baking soda
1 teaspoon ground cinnamon
1/3 cup canola oil
1/3 cup pure maple syrup
1 large egg, at room temperature
2/3 cup grated carrots (from 1 medium peeled carrot)
2/3 cup grated zucchini (from 1 medium unpeeled zucchini)
1/2 cup raisins

Directions

Place an oven rack in the center of the oven. Preheat the oven to 350 degrees. 

Line 24 mini-muffin cups with (1 1/2-inch) paper liners. Set aside.

In a medium bowl, sieve together the flours, salt, baking powder, baking soda, and cinnamon. Add any solids leftover in the sieve to the bowl and mix in.
In a separate medium bowl, whisk together the oil, syrup, and egg. Add the dry ingredients and mix until just combined. Mix in the grated carrot, grated zucchini, and raisins.

Using a 1 ounce ice cream scoop, fill the prepared muffin cups with one scoop of batter. Bake until light golden, about 15 minutes. Cool for 5 minutes. Transfer the muffins to a wire rack to cool completely, about 30 minutes.


Gluten Free Carrot & Zucchini Mini Muffins


Eat, Drink & Be Yummy!

Any Herb Roasted Pork Loin


At this point, I've become very accustomed to not only feeding our family of five, but also hosting  family dinners.  Our family + my parents + my sisters family + my husbands parents, + my husbands brothers family = 18 people.  And that's just IMMEDIATE family members!
My love for cooking probably stems from my love for improvisation.  This recipe works well with whatever fresh or dry herbs I've substituted. Fresh rosemary and thyme? Yummy!  Dried rosemary and thyme?  Still Yummy!!!  Dried Italian seasoning? Yummy!  Dried Herbs DeProvence? Yummy!

As much as I love to cook and improvise, I love spending time with my family even more.  Roasting a loin of pork is a great entree that doesn't require much hands-on time.  I try to time the cooking of the loin so that it's done just as guests arrive.  While it's resting, we're having salads and appetizers and the pork is ready to cut into, just in time for dinner.


Herb Crusted Pork Loin

Ingredients

Base recipe
1 (4-pound) boneless pork loin, with fat left on
1 TBSP Kosher Salt
2 TBSP olive oil
4 cloves garlic, minced (or 1/2 tsp of garlic powder)


Option 1
tsp dried basil or 2 tsp fresh basil leaves
tsp dried rosemary or 2 tsp minced fresh rosemary
1 tsp dried thyme or 2 tsp minced fresh thyme leaves

Option 2
1 TBSP dried Herbs De Provence

Option 3
1 TBSP dried Italian Seasoning

Directions

Preheat oven to 475 degrees F.

1. Place the pork loin on a rack in a roasting pan. 
2. Combine the remaining ingredients with either Option 1, 2 or 3 in a small bowl. 
3. Using your hands, coat the entire pork loin with the mixture. 
4. Insert thermometer probe into center of meat (connecting it to the external digital display) and put the loin into the oven.
5. Roast the pork for 30 minutes, then reduce the heat to 425 degrees F and roast for 45-60 minutes, until thermometer reads 155 degrees.
6. Remove from oven and allow to rest for about 20 minutes. The internal temperature of the loin will continue to rise while it's resting. 

Eat, Drink & Be Yummy!

Tuesday, October 30, 2012

Spaghetti Squash w/Pecans, Dried Cherries & Gorgonzola with Sherry Vinaigrette

Always on the lookout for interesting combinations of ingredients, I came across this recipe for Spaghetti Squash with Pecans, Dried Cherries and Gorgonzola on Savoring The Thyme. This is a fantastic side dish for mid-week dinners as well as a Thanksgiving side.

It looked so vibrant and flavorful that I had to put it up as an offering on the weekly menu.  Clients loved the flavor and it was a bit hit with the kids!

Spaghetti Squash with Pecans, Dried Cherries & Gorgonzola
with Sherry Vinaigrette

Releasing the spaghetti squash from the shell

Spaghetti Squash with Pecans, Dried Cherries and Gorgonzola with Sherry Vinaigrette


Recipe adapted from Savoring The Thyme
Serves 6-8 as a side dish, or 3-4 as an entree

Ingredients

1 (3 lb.) spaghetti squash
1/2 cup Gorgonzola, crumbled
1/2 cup pecans, roughly chopped and toasted
1/2 cup dried cherries
2 green onions (white & green parts), thinly sliced

2 tablespoons Dijon-style mustard
1 tablespoon finely chopped shallots
1/2 teaspoon finely minced garlic
3/4 cup vegetable or canola oil
1/4 cup sherry vinegar
Kosher salt and freshly ground pepper to taste

Directions

Preheat oven to 375 degrees.

1. Using a large, sharp knife, cut spaghetti squash in half, lengthwise.
2. Scrape out the seeds and pulp as you would with any squash or pumpkin. 
3. Bake, rind side up about 30 minutes.  Remove from oven and allow to cool down.
4. Using a fork, twist out strands of the spaghetti squash flesh and place in a large bowl.
5. In a small bowl, add the mustard, shallots and garlic and gradually add half the oil, beating vigorously with a wire whisk.
6. Alternately beat in the remaining oil and the vinegar.
7. Taste and season with kosher salt and pepper.
8. Combine spaghetti squash with cheese, pecans, cherries, most of green onions, and the sherry vinaigrette.  Stir well.
9. Serve and garnish with remaining green onions.


Eat, Drink & Be Yummy!!


Call Me Spanakopita Purses, Maybe

Sometimes I make bad decisions.  There, I admit it.  I thought that I could do one of my quickly thrown together dinners and as I was throwing together that dinner, I could quickly snap some pictures. And not just snap pictures but attempt to capture proportions of my chopped-style meals that magically come together. After all, I've yet to create a step-by-step photographed blog posting.  The internal dialogue I had sounded something like, "I'm SOOO going to take advantage of tonight's dinner preparation! I'm a genius! I'm a genius!" 

I should stop listening to my internal dialogue, because I'm not a genius. I'm an idiot.  This was a feat that should have been saved for a better time. The preparation was a comedy of errors. Post-school & swim, this was one of our late nights and the kids were famished. Yet, I still attempted to take pictures of each step of the process, while three kids were running underfoot and asking for help with homework. Child #2 helped to butter some of the phyllo layers, but then ran off to do homework. Child #3 stuck by my side long enough to help (eat the raw sheets of phyllo dough). 

It wasn't just the kids that weren't cooperating. I couldn't get my hands to manipulate the thin sheets of dough. The end product was intended to be finished as evenly shaped triangles, but I couldn't get them to keep their shape. I refused to go down with my sinking ship! Taking a note from Melissa Clark's recent article in the NYT I threw them into a muffin tin and called them "purses". 


It was a later than usual dinnertime, but it was a tremendous success!


Chop an onion

Heat oil in heavy bottom pot and add onion.

Saute onion until browned

Frozen Crushed Garlic. FANTASTIC when you're in a rush.

Chop 10 ounces of fresh spinach into bite size pieces

Add spinach to pot and stir to coat with oil and onions.
Add water and prepare to be watch a disappearing act!

A pot full of raw spinach wilts down to almost nothing!
Remove from heat and let cool down.

Child #2 helps to spread butter on each square of phyllo.
Dice manouri cheese... What's manouri cheese?
Manouri is a bit smoother than feta.  It's available at most supermarket deli counters.

Add feta, manouri and pecorino romano to spinach and onion mixture.

Ask youngest child to help

Calculate a percentage of product loss.

Gather phyllo corners together and place purses into a muffin tin.
Bake at 350 for 20 minutes.

Spanakopita Purses Served with Grilled Zucchini

Spanakopita Purses


Ingredients
2 TBSP olive oil
1 medium onion, small dice

2 cubes of frozen garlic cubes (or 2 freshly grated cloves)
10 ounce fresh spinach,  chopped
1/8 cup water
2 ounces of feta, diced
8 ounces manouri cheese, diced
2 TBSP pecorino romano, grated
Kosher salt and pepper, to taste

Few squares of phyllo dough (defrosted)
4 TBSP butter, melted
Silicone Pastry Brush

Preheat oven to 350 degrees.

Instructions for Filling
1. In a heavy bottom pot, add olive oil and heat on High. 
2. When hot, add onion and saute. 
3. Add 2 cubes of frozen TJ's garlic (no time to peel and mince my own) and warmed through. 
4. Take the pieces of bite size spinach and add them to the pot. Saute to coat with oil and heat through. 
5. Added water to pot. This will deglaze the pot a bit and help the spinach wilt. Saute spinach until wilted.
6. Remove from heat and let cool. 
7. When cool, combine with: diced feta, diced manouri and pecorino romano.  
8. Taste and add salt/pepper to your liking.

Instructions for Dough
1. Take each sheet and cut into two squares (my sheets were rectangular and about 2 inch border was thrown out). 
2. Separate each sheet and brush melted butter. Repeat for two more sheets, placing each square on top of the previous.
3. Three phyllo squares will make one "purse".

Directions to Combine
1. Add about 3 TBSP of the spinach/cheese mixture into the middle of the phyllo dough. 
2. Bring the four edges together and put into muffin tin. 
3. Bake 20 minutes at 350 degrees. 
4. Let cool for a few minutes and serve.

Eat, Drink & Be Yummy!

Sunday, October 28, 2012

Balsamic Onion Jam & Goat Cheese Crustini

Potlucks.  I have a love/hate relationship with them.  Love them because the element of suspense is so exciting.  Hate them because you never know if you're going to leave famished because everyone is going to bring a cheesecake.


This has been my go-to potluck dish for a few reasons...
     
     *Can be made up to 3 days ahead of time.
     *No fork and knife required.
     *Simple elements that can be combined before the event or at the event.
     *Finally, the best indicator at the dish's success: I usually need to replenish the platter twice during an evening.

If we
ever happen to be invited to the same potluck event, chances are good that I'll be showing up with these!


Balsamic Onion Jam & Goat Cheese on Crustini

Adapted from Emeril Lagasse's Crostini with Balsamic Onions and Cheese

3 or 4 red onions, diced
1 large Vidalia or Spanish onion, diced
3 tablespoons butter
1/8 cup of olive oil
½ cup of balsamic vinegar
Kosher Salt to taste
Pepper to taste
Chopped chives (optional)

1 log goat cheese
1 baguette or thin loaf of Italian bread

Directions Crustini
1. Slice about 24 (1/4-inch-thick) diagonal slices cut from a thin baguette.  

2. Arrange on a baking sheet and bake for 5 minutes. 
3. Turn over and bake until golden, another 5 minutes.  
4. Remove from oven to cooling rack until they come to room temperature. 
5. Can be stored in a ziploc bag or container until ready to be served.

Directions Balsamic Onion Jam
1. Melt olive oil and butter in a medium sized pot.  

2. Add onions, cover the pot and sweat them until soft and translucent on medium heat. This takes about 10 minutes.  
3. Add balsamic vinegar and cook uncovered, over medium heat until reduced by about 1/4 to 1/3 and the onions start to become coated by the balsamic vinegar, stirring periodically. This takes about an hour.
4. Take off heat and allow onions to come to room temperature.

Directions to combine:
1. Spread goat cheese on cooled and toasted baguette slices.  

2. Top with room temperature onions.
3. Garnish with chopped chives.

Eat, Drink & Be Yummy!

Saturday, October 27, 2012

Chicken Liver Mousse

Not all foods are sexy.  They're not.  As much as I WANT all food to be visually alluring, sometimes they're blobs.  Yummy tasting blobs, but blobs nevertheless.  

Oatmeal?  Jazz it up however you like, but it's a blob. Mashed potatoes? Blob. Chicken liver mousse? Heck, this isn't just a blob, but it's a blob that many people would never even consider trying.  I imagine that aside from knowing that it's chicken liver, the visual appearance of a blob isn't helping to sell chicken liver mousse.

Sometimes, just sometimes, we have to put visual aesthetics aside, close our eyes and just eat. Because THIS culinary experience is not one that you want to miss...


Looks like the ingredients of a "Chopped" basket, right?

Throw the onions, apples and thyme into a pan and saute with butter

Apples and onions will soften and take on a gorgeous light brown color

Add the chicken liver and saute just a few more minutes until it starts to firm up,
but the inside is still soft and pink.

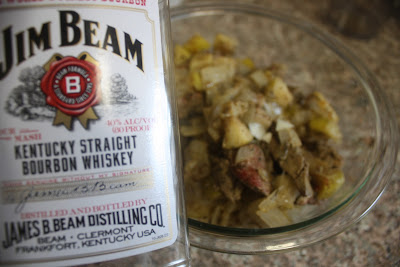
My buddy Jim Beam is invited to THIS party!!!

Using an immersion blender or standard blender, puree all ingredients.
Refrigerate puree.

Pour a cup of whipping cream into stand mixer

Whip until stiff peaks form

Stiff peaks (insert juvenile laughter HERE)

Add refrigerated chicken liver to whipped cream and gently fold together.

Prepare enough for guests to take home!
Chicken Liver Mousse

Chicken Liver Mousse

Adapted from Alton Brown's Recipe

Ingredients
2 tablespoons butter
2 cups chopped Vidalia onion (about one large onion)
1 cup chopped tart apple, skin on
1 teaspoon fresh thyme leaves
1 pound chicken livers, cleaned
1/4 teaspoon ground white pepper
1/2 teaspoon salt
1/4 cup bourbon

1 cup heavy cream

Directions
1. In a large saute pan over medium low heat, melt the butter and cook onion, apple, and thyme, covered, until apples soften. 
2. Remove lid and add the livers and cook until firm and still pink inside. 
3. Remove from the heat and allow to cool. 
4. Add the pepper, salt, and brandy and puree with an immersion blender or in a food processor
5. Refrigerate, covered, for at least 30 minutes.
6. Whip the heavy cream to medium peaks. 
7. Fold whipped cream into cooled, pureed liver mixture. 
8. Refrigerate for at least an hour or up to 4 days.
9. Serve chilled on toasted baguette.

Eat, Drink & Be Yummy!

Baked Apple Cider Donuts

I want to believe that there will be world peace one day. I want to believe that Yankees fans will one day embrace Mets fans. But more than anything, I want to believe that *not* everything tastes better when it's deep fried.  

Could it be true?  Can something as magical as doughnuts be delicious without the deep fat fryer?  Indeed.  Baked apple cider donuts come out fluffy, moist and cakey... with a slight crusty sugar coating.  

While this isn't quite solving the problems of the world, it did provide the family with a considerably less guilty version of a fall classic treat!


Gently combine the wet and dry ingredients. Don't over mix.

Oil the donut cavities and sprinkle granulated sugar to coat


Fill with 2 TBSP of donut mixture

Allow to cool and gently twist out of mold.

Baked Apple Cider Donuts

Baked Apple Cider Donuts


Adapted from Recipe Girl

Yield: 18 donuts (based on Wilton's 6 cavity doughnut pan)


Ingredients:
2 cups all-purpose flour
1 1/2 teaspoons baking powder
1 1/2 teaspoons baking soda
1/2 teaspoon salt
1 large egg, beaten
2/3 cup packed brown sugar
1/2 cup Trader Joe's Pumpkin Butter (substitute with apple butter*)
1/3 cup pure maple syrup
1/3 cup Trader Joe's Spiced Apple Cider (substitute with apple juice*)
1/3 cup plain nonfat yogurt
3 tablespoons vegetable or canola oil

vegetable or canola oil for preparing pans

granulated sugar for preparing pans

*NOTE: If you substitute apple butter for TJ's Pumpkin Butter or if you substitute apple juice for TJ's Spiced Apple Cider, add 2 teaspoons of cinnamon and 3/4 teaspoon of nutmeg to batter.

Directions:
1. Preheat oven to 400°F. 
2.Coat pan with nonstick spray or oil, spreading with a napkin square. Sprinkle with sugar, shaking out excess.
3. In a mixing bowl, whisk together flour, baking powder, baking soda, and salt; set aside. 
4. In another bowl, whisk together egg, brown sugar, apple butter, maple syrup, cider, yogurt and oil. 
5. Add dry ingredients and stir just until moistened. 
6. Using a 1 TBSP ice cream scoop, place 2 TBSP of batter into each donut cavity.
7. Bake 10 minutes or until the tops spring back when touched lightly. 
8. Allow to cool for a few minutes. Gently turn the donut, loosening the edges and pull out.

Enjoy immediately or store in an air tight container for up to 3 days (if they last that long!)

Eat, Drink & Be Yummy!

Thursday, October 25, 2012

Mac and ANY Cheese

Proper macaroni and cheese is baked.  Proper macaroni and cheese is made with the same mixture of cheeses every time.  Proper macaroni and cheese does not exist in my household.  

We love cheese. At the end of every two weeks or so, I find that it's time to use up our blocks of cheese, else they will end up in the garbage (no! no! no!).  There's almost always a melt-y cheese like cheddar or Gruyere or goat and a salty cheese like feta or parmesan.  Occasionally there's also the sharp flavor of a stilton, gorgonzola or blue cheese... or Trader Joe's Truffle Cheese which is both sharp and melt-y!

Mac and cheese is also a great opportunity to get extra servings of vegetables in.  Peas, broccoli and cauliflower all work great as add-ins!

The following recipe works for my family for two reasons.  First, no baking is required; because I rarely have that extra 20-30-40 minutes to bake.  Second, it uses up all of those leftover little bits of cheese hanging around in our deli drawer, making each mac and cheese experience slightly different.


Stovetop Macaroni & Cheese

Ingredients
2 TBSP butter
1/4 Cup all purpose flour (you can substitute with 2 TBSP of corn starch to make a gluten free roux)
2 1/2 Cups Whole Milk (can substitute with skim or 2%)
2 cups of shredded cheeses (at least one that melts well)
Kosher salt and freshly ground pepper to taste
1/2 box of any pasta cooked and drained*

Directions
1. In a heavy bottom pot on medium heat: melt 2 TBSP butter. 

2. Add 1/4 cup AP flour. 
3. Whisk until combined into chunks. 
4. Add 1 cup of milk, while continuously stirring to combine.  
5. When it turns into a thick paste add remaining 1 1/2 cups of milk
6. Continue whisking until milk is warmed through and all of the roux (butter and flour) are smooth and combined. No chunks!
7. Turn heat down to low.
8. Add shredded cheeses. You can use chunks of cheese, but the shredded just incorporates faster. Continue stirring until all cheese is melted. 
9. Remove from heat.
10. Add Kosher salt and pepper to taste. 
11. Add cooked pasta to the pot. Stir to coat each piece with sauce.

*Depending on how "creamy" you like your mac & cheese, this is enough sauce for anywhere from 1/2 box of cooked pasta (super cheesy) to a full box of cooked pasta (just enough to cover the pasta).

Eat, Drink and Be Yummy!

Orange Glazed Salmon

As much as I love food, I love good food prepared simply even more. When you get great quality base ingredients, I find that there isn't a need to over complicate the preparation. The other problem with complicated preparations is that they're usually time consuming.  With three kids singing the "when is dinner gonna be ready???" song, time is usually at a minimum in my kitchen.


Orange Glazed Salmon

Ingredients

2 pounds salmon fillet
1 cup orange juice (about 2 squeezed oranges)
2 teaspoons balsamic vinegar
1 teaspoon grated ginger
Kosher salt and freshly ground pepper to taste

Thinly Sliced Tangerines (optional)
Orange Zest (optional)
Parsley (Optional)


Directions

1. Preheat oven to 400 degrees F (200 degrees C).
2. Place orange juice in a small saucepan over medium heat. 
3. Cook and stir 10 to 15 minutes, until reduced by about 1/2 and thickened. Remove from heat, and allow to cool.
4. Stir balsamic vinegar and ginger into reduced orange juice.
5. Line a medium baking dish with parchment paper. 
6. Place salmon on paper, skin side down. Season with salt and pepper. 
7. Cover with 1/2 the orange juice mixture. 
8. Optional: Place sliced tangerines on top of salmon.

If you like LESS sauce (as pictured):
9. Bake salmon in the preheated oven for 18-20 minutes.

If you like MORE sauce:
9. Bake salmon in preheated oven for 10 minutes.
9b. Remove from oven and cover with 1/2 of the remaining marinade.
9c. Continue baking for another 10 minutes.
9d. Once salmon has been plated, add remaining marinade to each piece.

10. Sprinkle with orange zest and parsley. (Optional)
11. Prepare yourself for comments like "Ooooh, fancy dinner!" (Guaranteed!!!)

Eat, Drink and Be Yummy!

Shrimp Toast Bites


Very often, I eat something that I immediately want to learn how to recreate. This leads to frequent trips back to the restaurant, during my attempt to mimic the dish, so that I can try to hit each flavor and texture mark. Great for my palate, not so much for my waist and wallet.I love shrimp toast. And when I have small dinner parties where I can serve them immediately, these have become my go-to appetizer. When making these for the kids, they rarely have enough time to make it through the cool-down stage before being devoured!


Sesame Shrimp Toast

Ingredients:
½ inch piece ginger, peeled
2 garlic cloves
1/2 lb shrimp, peeled and deveined
1/4 bunch cilantro
1/4 cup water chestnuts
1 egg white
2 ramps (when ramps aren't in season, I use 2 scallions)
1 1/2 tablespoons soy sauce (low sodium, i you prefer)
1 teaspoon sesame oil
salt and pepper to taste

1/2 loaf sourdough or pullman bread, crusts removed and cut into 1 inch squares
2 tablespoons toasted sesame seeds
1/3 cup vegetable oil

Directions:
1. Into the cup of an immersion blender, place ginger, garlic cloves, cilantro, water chestnuts, egg white, ramps soy sauce, and sesame oil.  Puree.
2. Add shrimp and pulse immersion blender just to combine into a coarse paste.
3. Spread about 3/4 tablespoon of mixture onto a square of bread and sprinkle with sesame seeds. 
4. Pour oil into a heavy bottom skillet and heat pan on medium heat.
5. Carefully place ONE square of bread, shrimp-side down and fry for 4 to 5 minutes or until golden brown.
6. Flip square over and fry (on bread side) for another 2 minutes, until bread becomes golden brown.  
7. Remove from frying pan and taste for salt. Drain on paper towel. Sprinkle with kosher salt and a few more sesame seeds.
8. Add additional salt to main batch of paste, based on "test square".
9. Repeat steps 5-8 with remaining paste and bread, working in batches, until all bread squares have been fried with shrimp paste. 
10. Serve hot.

Eat, Drink and Be Yummy!